
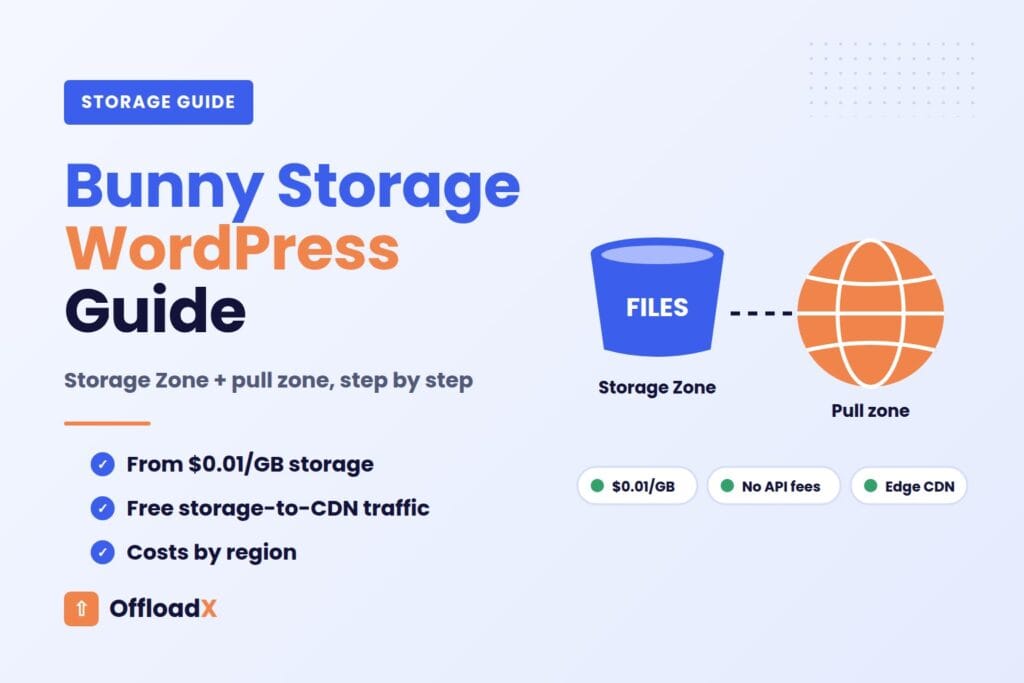
Bunny Storage WordPress setups have become popular for a simple reason: storage and CDN come from the same company. Your media sits in a Bunny Storage Zone, a Bunny pull zone delivers it from edge servers around the world, and traffic between the two is free. For many sites, that is the fastest way to get images off the hosting plan and closer to visitors in one step.
This guide covers everything you need for a Bunny Storage WordPress setup: how Storage Zones and pull zones fit together, what it really costs by region, when Bunny beats Cloudflare R2 (and when it does not), and a step-by-step setup with a testing checklist at the end.
Table of Contents
- What Is Bunny Storage?
- How a Bunny Storage WordPress Setup Works
- Bunny Storage Pricing Explained
- Real Monthly Cost Examples
- Bunny Storage vs Cloudflare R2 for WordPress
- Bunny Storage vs Using Bunny CDN Alone
- How to Set Up Bunny Storage for WordPress
- Choosing Regions and Replication
- Moving Your Existing Media Library
- Testing Checklist
- Common Problems and Fixes
- Frequently Asked Questions
What Is Bunny Storage?
Bunny Storage is the object storage service from bunny.net, the company best known for Bunny CDN. It stores files in “Storage Zones”, which work much like buckets on Amazon S3 or Cloudflare R2.
What makes it different is how tightly it is linked to the CDN. According to Bunny’s storage pricing page, traffic from Bunny Storage to Bunny CDN is free, API egress is free and there are no API request fees. You pay for the gigabytes you store and the CDN bandwidth your visitors use, and nothing else.
Two storage tiers
- Standard (HDD): the cheaper tier. You choose a main region and can replicate to more regions.
- Edge (SSD): faster storage for frequently read files. Bunny’s quickstart notes the Edge tier’s main region is Frankfurt.
For WordPress media behind a CDN, the Standard tier is the right choice for almost every site. The CDN caches your images at the edge, so the speed of the storage underneath matters much less.
How a Bunny Storage WordPress Setup Works
A Bunny Storage WordPress setup has three parts that work together:
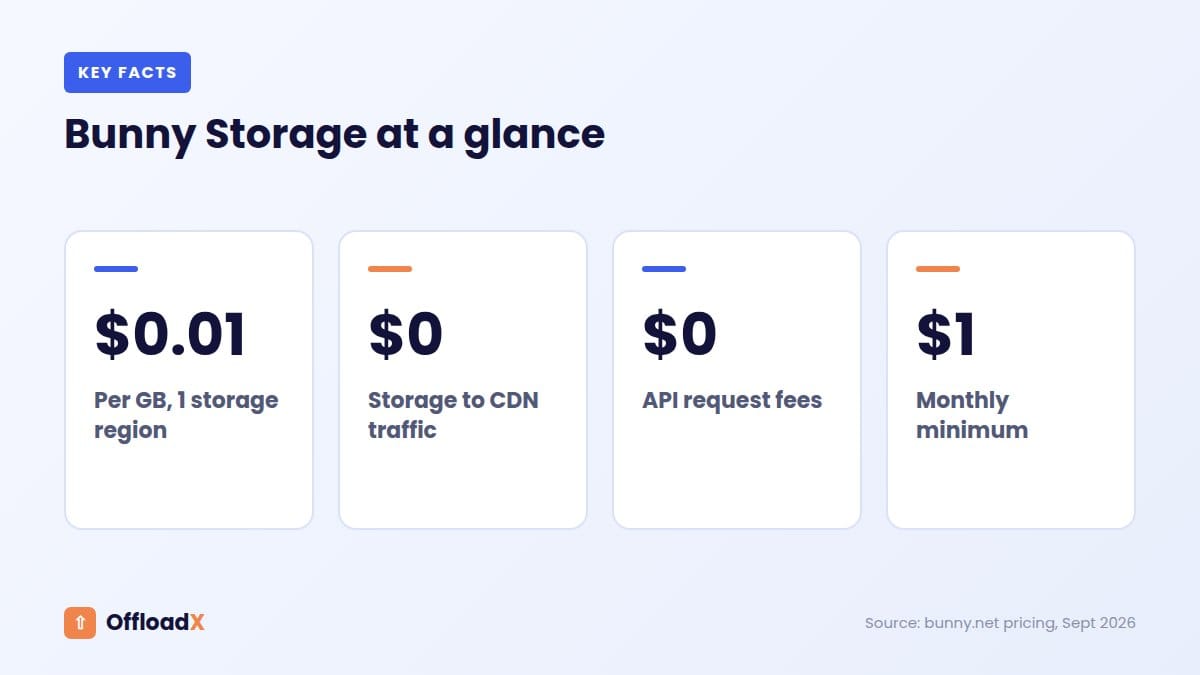
- Your WordPress site with an offload plugin. When you upload a file, the plugin sends it to Bunny Storage and rewrites the file’s URL.
- A Storage Zone that holds the files. Storage Zone URLs are private: visitors cannot load files from them directly.
- A pull zone connected to that Storage Zone. This is the public address, such as
yoursite.b-cdn.netor your ownmedia.yoursite.com. Every image on your pages loads from here.
The most common mistake is skipping step 3. Without a pull zone, your files upload fine but every image on the site breaks, because the Storage Zone itself is not public. In OffloadX, the Pull Zone CDN URL is a required field for Bunny for exactly this reason.
Key point: In a Bunny Storage WordPress setup, the Storage Zone holds your files and the pull zone serves them. You always need both.
Bunny Storage Pricing Explained
Bunny’s prices, checked in September 2026, come in two parts: storage and CDN delivery.
Storage
| Tier and replication | Price per GB per month |
|---|---|
| Standard, 1 region | $0.01 |
| Standard, 2 regions | $0.02 |
| Standard, 3 regions | $0.025 |
| Standard, each extra region (up to 9) | +$0.005 |
| Edge SSD, per region | $0.02 |
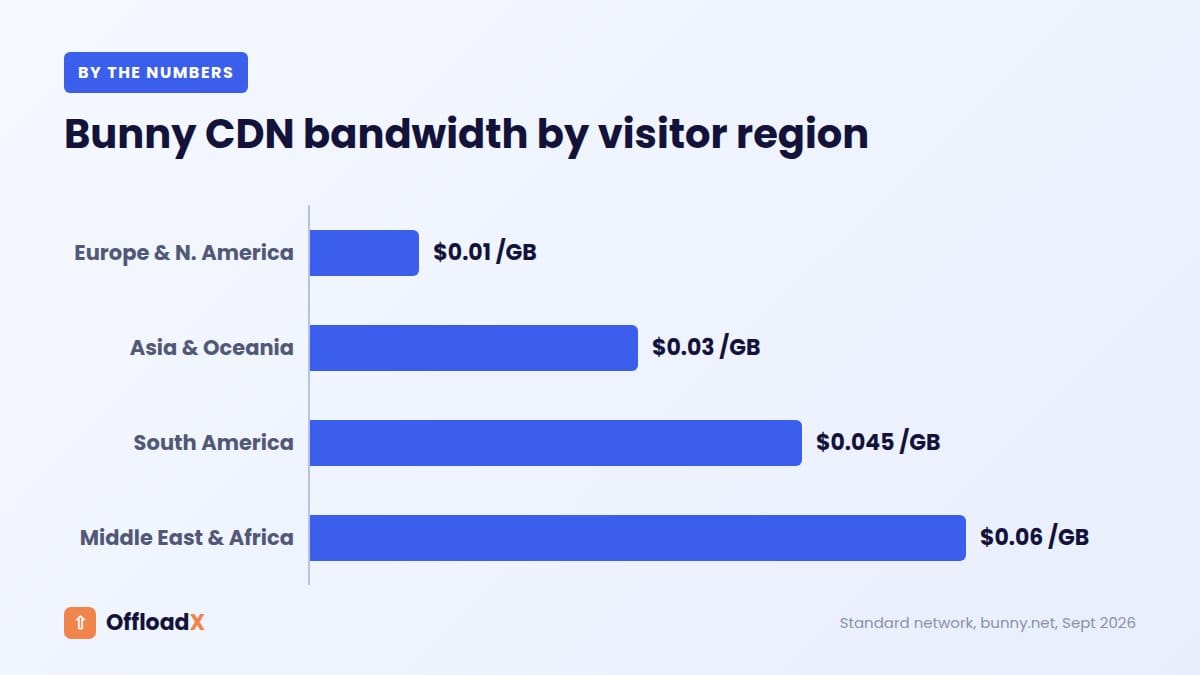
There is a $1 monthly minimum. There are no request fees and no charge for moving data from storage to the CDN.
CDN delivery
Bandwidth is charged by where your visitors are. These are the standard network prices from Bunny CDN pricing:
| Visitor region | Price per GB |
|---|---|
| Europe and North America | $0.01 |
| Asia and Oceania | $0.03 |
| South America | $0.045 |
| Middle East and Africa | $0.06 |
Bunny also offers a Volume network with fewer locations, starting at $0.005 per GB for the first 500 TB. It suits very high-traffic sites that care more about cost than about having an edge server in every country.
Real Monthly Cost Examples
Here is what a Bunny Storage WordPress setup costs for three typical sites, using Standard storage in one region and the standard CDN network.
| Site | Stored | Delivered per month | Storage | CDN | Total |
|---|---|---|---|---|---|
| Blog, mostly US/EU visitors | 20 GB | 100 GB | $0.20 | $1.00 | $1.20 |
| Busy magazine, US/EU | 200 GB | 1,000 GB | $2.00 | $10.00 | $12.00 |
| Store with Asia/Oceania buyers | 100 GB | 500 GB | $1.00 | $15.00 | $16.00 |
Storage is almost free at these sizes. The real cost of Bunny is bandwidth, and it depends heavily on where your audience lives. A site whose visitors are mostly in Africa or the Middle East pays six times more per GB than one serving Europe.
Bunny Storage vs Cloudflare R2 for WordPress
Cloudflare R2 is the other popular choice for WordPress media. It charges $0.015 per GB-month with 10 GB free, and no egress fees at all (R2 pricing). Here is how the two compare.
| Bunny Storage + Bunny CDN | Cloudflare R2 | |
|---|---|---|
| Storage price | $0.01/GB (1 region) | $0.015/GB, 10 GB free |
| Bandwidth | $0.01–$0.06/GB by region | No egress fees |
| Request fees | None | Charged beyond the free tier |
| CDN | Bunny pull zone, billed per GB | Cloudflare network via custom domain |
| Minimum spend | $1/month | $0 within free tier |
| Best for | Sites wanting a simple CDN-first setup and fine cache control | High-traffic sites wanting zero bandwidth cost |
When Bunny Storage wins
- You already use Bunny CDN. Keeping storage and delivery in one dashboard is simpler.
- You want CDN controls. Pull zones give you detailed caching, logging and security options per zone.
- Your traffic is modest. At 100 GB to 1 TB a month in Europe and North America, delivery costs $1 to $10.
When Cloudflare R2 wins
- You serve a lot of traffic. With no egress fees, R2’s cost does not grow with visitors.
- Your audience is in higher-priced regions. Bunny bandwidth to Asia, South America or Africa costs $0.03 to $0.06 per GB; R2 charges nothing.
- Your site already runs on Cloudflare. An R2 custom domain slots into your existing setup.
For a deeper look at R2, read our Cloudflare R2 offload guide and our cloud storage cost comparison.
Bunny Storage vs Using Bunny CDN Alone
Many WordPress owners already use Bunny CDN on its own: a pull zone that fetches files from their web server and caches them. That is a good speed upgrade, but it is not the same as a Bunny Storage WordPress setup.
| Bunny CDN only (origin = your server) | Bunny Storage + pull zone | |
|---|---|---|
| Where files live | On your hosting disk | In the Storage Zone |
| Frees disk space | No | Yes, once local copies are removed |
| Smaller backups | No | Yes |
| Server load on cache misses | Your server answers | Bunny Storage answers |
| Faster delivery to visitors | Yes | Yes |
If your only goal is speed, a CDN in front of your server may be enough. If your hosting disk is filling up, backups take hours, or you are about to move hosts, you need the files themselves off the server. That is what Bunny Storage adds.
Which files to offload
- Always: images and all generated thumbnail sizes. They are the bulk of most libraries.
- Usually: PDFs, audio and video. Large files benefit most from edge delivery.
- Think twice: files that should not be public, such as paid downloads or private documents. Anything served through a public pull zone can be opened by anyone with the link.
Keep an eye on bandwidth
Because bandwidth is the main cost, check the pull zone’s statistics after the first week. bunny.net shows traffic by region, so you can see whether your real audience matches your estimate. If one region dominates your bill, that tells you where compression and caching will save the most.
How to Set Up Bunny Storage for WordPress
These steps use OffloadX, which supports Bunny Storage on every plan, including the free one.
Step 1: Create a Storage Zone
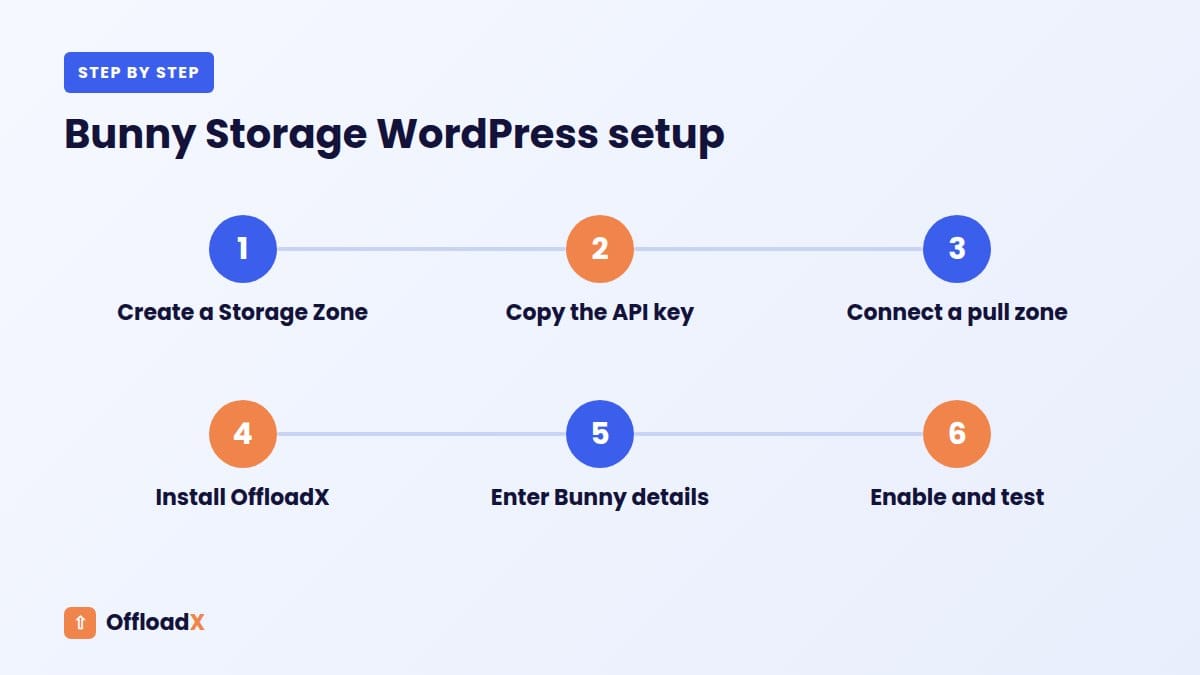
In your bunny.net dashboard, open Storage and click Add Storage Zone. Give it a name, choose the Standard tier and pick a main region close to your server or most of your visitors. Storage Zone names are case-sensitive, so note the exact spelling.
Step 2: Copy the API key
Open the new Storage Zone and go to FTP & API Access. The value labelled “Password” is the Storage Zone’s API key. Copy it, along with the storage region.
Step 3: Create and connect a pull zone
Go to CDN and add a pull zone (or open an existing one). Set the origin type to Storage Zone and select the zone you just created. Bunny gives you a hostname such as yoursite.b-cdn.net.
For a cleaner, more portable setup, add your own hostname to the pull zone, for example media.yoursite.com, create the CNAME record Bunny shows you at your DNS provider, and enable the free SSL certificate.
Step 4: Install OffloadX
Download OffloadX from offloadx.com, go to Plugins → Add New → Upload Plugin, upload the ZIP file and activate it.
Step 5: Enter your Bunny details
In OffloadX Credentials, choose Bunny Storage and enter:
- Storage Zone Name: exactly as created.
- API Key: the “Password” from FTP & API Access.
- Storage Region: the zone’s main region.
- Pull Zone CDN URL: your b-cdn.net hostname or custom domain.
Run the connection tester to confirm the plugin can write to the zone.
Step 6: Enable offloading and test
Turn on automatic offloading in Behaviour. Upload a test image, add it to a draft post and preview. Open the image in a new tab: its address should start with your pull zone hostname.
Choosing Regions and Replication
With a CDN in front, your main storage region matters less than you might think. Visitors load cached copies from the nearest edge server; the Storage Zone is only read when the CDN needs a file it has not cached yet.
Practical guidance
- Pick the main region nearest your WordPress server. Uploads from the plugin will be quicker.
- Add replication only if you need it. A second region doubles storage cost from $0.01 to $0.02 per GB, which is still cheap, and helps if your audience is spread across continents or you want extra redundancy.
- Skip Edge SSD for normal media. It is designed for files read constantly from storage, not for images already cached by a CDN.
Set long cache times
WordPress media files rarely change once uploaded: an edited image gets a new file name. That means you can safely let the CDN cache media for a long time, which reduces trips to storage and speeds up repeat visits.
Bunny Storage for Stores, Video and Podcasts
Some WordPress sites benefit from Bunny Storage more than others.
- WooCommerce stores: product galleries create many image sizes per product. Moving them to Bunny keeps the hosting disk small and loads product pages from the edge. In OffloadX, WooCommerce support is on the Business and Agency plans.
- Podcasts and audio: large MP3 files served from a CDN reduce load on your server when a new episode goes out.
- Video downloads: big files are exactly where edge delivery helps most. Keep an eye on bandwidth by region, as video can use a lot of it.
Moving Your Existing Media Library
On OffloadX paid plans, Bulk Migration moves your existing library in the background, and URL Replace updates the file links stored in your database so older posts load from the pull zone too.
- Back up first: take a full copy of files and database.
- Compress images before migrating: smaller files mean lower bandwidth bills for as long as they are online.
- Keep local copies until you have checked the site: once everything loads correctly, you can remove local files to free disk space.
If disk space is the main reason you are moving, our guide to fixing a WordPress site running out of disk space covers other quick wins too.
Testing Checklist
- Load the homepage, recent posts and an old post in a private window.
- Confirm image addresses use the pull zone hostname, not /wp-content/uploads/.
- Check images on a phone, as mobile screens load different thumbnail sizes.
- Open PDFs and play audio or video.
- Look at the pull zone statistics in bunny.net: requests and bandwidth should start rising.
- Run PageSpeed Insights on key pages and compare with results from before the move.
Common Problems and Fixes
| Problem | Likely cause | Fix |
|---|---|---|
| Files upload but images are broken | No pull zone, or wrong Pull Zone CDN URL | Connect a pull zone to the Storage Zone and enter its hostname. |
| Connection test fails | Wrong key or zone name case | Use the Storage Zone’s “Password”, not your account API key; match name case exactly. |
| Uploads fail after setup | Region does not match the zone | Select the zone’s main storage region. |
| Custom domain shows SSL error | Certificate not issued yet | Check the CNAME record and request the free certificate in the pull zone. |
| Old posts still load local images | Database URLs not replaced | Run URL Replace, then clear your page cache. |
| Higher bill than expected | Traffic from pricier regions | Check bandwidth by region in bunny.net; consider the Volume network or R2. |
Frequently Asked Questions
Is Bunny Storage good for WordPress?
Yes. It is cheap to store files, has no request fees and pairs natively with Bunny CDN, so images are delivered from edge servers worldwide. Your main cost is CDN bandwidth.
Why do I need a pull zone with Bunny Storage?
Storage Zone URLs are private. Only a connected pull zone makes files publicly accessible, so visitors can load your images.
How much does Bunny Storage cost for a WordPress site?
Standard storage in one region is $0.01 per GB per month, with a $1 minimum. CDN bandwidth starts at $0.01 per GB in Europe and North America. Many small sites pay a few dollars a month.
Is Bunny Storage cheaper than Cloudflare R2?
For storage, yes. For bandwidth, no: R2 has no egress fees. Low-traffic sites often pay similar amounts on both; high-traffic sites usually save with R2.
Can I use my own domain with Bunny Storage?
Yes. Add a custom hostname to your pull zone, point a CNAME record to it and enable the free SSL certificate. Then use that hostname in your offload plugin.
Does the OffloadX free plan support Bunny Storage?
Yes. All seven providers are available on every plan. The Free plan covers one site and up to 100 files; paid plans remove the file limit and add bulk migration.
Does Bunny Storage replace my backups?
No. Offloading moves where files are served from; it is not a backup. Keep a separate backup of your media, or enable replication to a second region for extra redundancy.
How long does a Bunny Storage WordPress setup take?
For a new site, about 15 minutes: create the Storage Zone, connect a pull zone, enter the details in your plugin and test one upload. Moving an existing library takes longer, from a few minutes for small sites to a few hours for tens of thousands of files, and runs in the background.
Can I switch from Bunny Storage to another provider later?
Yes. Copy your files to the new provider, point your plugin at it and update URLs. If you serve media from your own subdomain, visitors never notice the change.
Conclusion
A Bunny Storage WordPress setup gives you cheap storage, zero request fees and a global CDN in one account. Always connect a pull zone, pick regions based on your audience, and compare bandwidth costs with R2 if your site serves a lot of traffic.
See OffloadX Plans →Pricing checked September 2026 from bunny.net and Cloudflare. Providers change prices from time to time, so confirm current rates on their websites.