
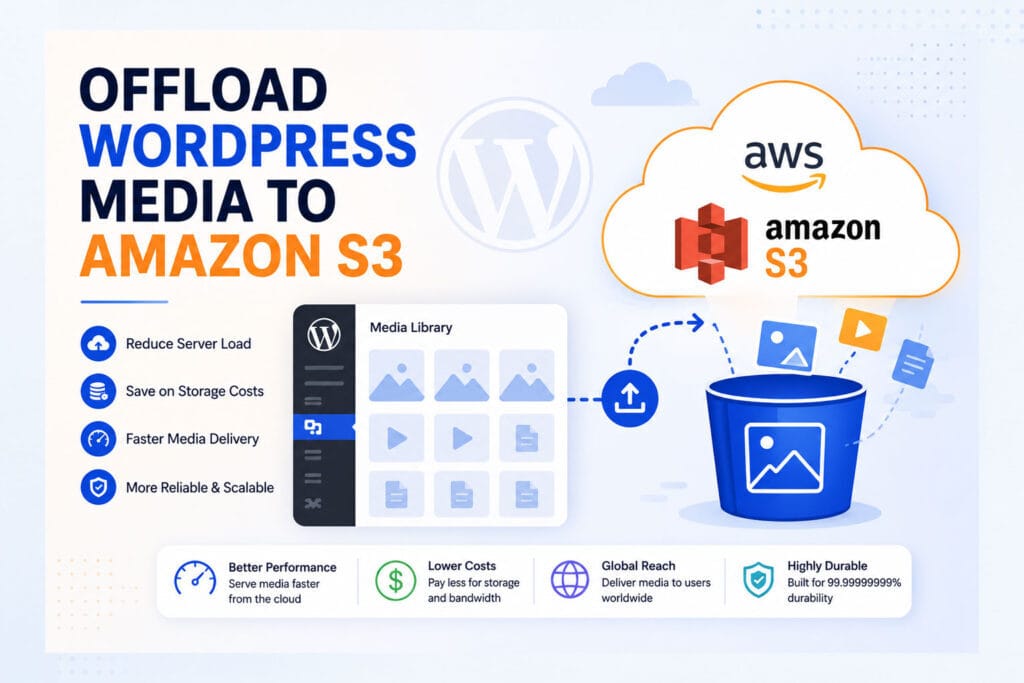
Amazon S3 is one of the most popular cloud storage options for WordPress media — and for good reason. It’s reliable, scalable, and works with virtually every WordPress offload plugin including OffloadX. If you want to offload WordPress media to Amazon S3, this guide walks you through every step from creating your AWS account to bulk migrating your existing media library.
Unlike some guides that skip the tricky parts, this one covers the full IAM setup, bucket permissions, CORS configuration, and the most common errors you’ll hit along the way when you offload WordPress media to Amazon S3.
Table of Contents
- Why Use Amazon S3 for WordPress Media?
- What You’ll Need Before Starting
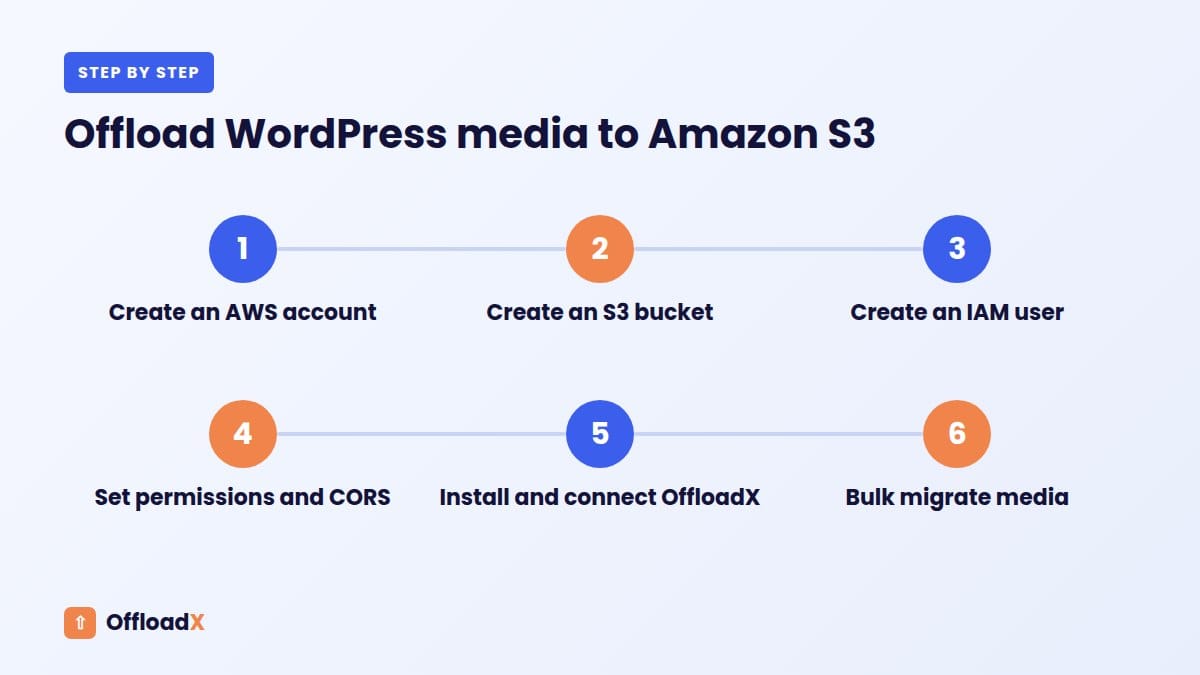
- Step 1 — Create an AWS Account
- Step 2 — Create an S3 Bucket
- Step 3 — Create an IAM User with S3 Permissions
- Step 4 — Configure Bucket Permissions and CORS
- Step 5 — Install OffloadX on WordPress
- Step 6 — Connect OffloadX to Amazon S3
- Step 7 — Configure Offload Settings
- Step 8 — Bulk Migrate Your Existing Media Library
- Step 9 — Set Up CloudFront CDN (Optional but Recommended)
- Troubleshooting Common Issues
- Should You Use Amazon S3 or Cloudflare R2?
- What It Costs to Offload WordPress Media to Amazon S3
- Keep Your S3 Setup Safe
- Frequently Asked Questions
Why Use Amazon S3 for WordPress Media?
When you offload WordPress media to Amazon S3, your server stops storing and serving media files entirely. Every image, PDF, and video is stored in S3 and delivered directly to visitors from there — freeing your server to focus on what it does best: running WordPress.
- Unlimited storage — S3 scales to petabytes with no storage caps
- 99.999999999% durability — AWS stores data across multiple facilities
- Global infrastructure — 33 AWS regions worldwide
- Deep AWS integration — works with CloudFront, Lambda, and other AWS services
- Industry standard — S3-compatible API used by all major cloud storage providers
Note: Amazon S3 charges egress fees — $0.09/GB every time a file is downloaded. For high-traffic sites, Cloudflare R2 may be more cost-effective. S3 is the better choice if you’re already in the AWS ecosystem or need advanced AWS integrations.
What You’ll Need Before Starting
- An AWS account (credit card required for signup — you won’t be charged until you exceed the free tier)
- A WordPress site with admin access
- OffloadX installed on WordPress
- About 20 minutes for the full setup
Step 1 — Create an AWS Account
If you don’t already have an AWS account, go to aws.amazon.com and click Create an AWS Account. You’ll need a credit card, but S3 has a free tier that includes 5 GB of storage and 15 GB of data transfer per month for the first 12 months.
Once your account is active, log in to the AWS Console and you’re ready to start.
Step 2 — Create an S3 Bucket
A bucket is the container where your WordPress media files will live once you offload WordPress media to Amazon S3. Here’s how to create one:
- In the AWS Console, search for S3 and click it
- Click Create bucket
- Enter a Bucket name — e.g.
yoursite-media. Must be globally unique, lowercase, no spaces - Choose an AWS Region closest to your server and most of your visitors
- Under Object Ownership, select ACLs enabled and Bucket owner preferred
- Under Block Public Access, uncheck Block all public access — confirm the warning
- Leave versioning and encryption at defaults
- Click Create bucket
Important: You must disable Block Public Access to allow visitors to load your media files. If you leave it enabled, images on your site will return 403 errors.
Step 3 — Create an IAM User with S3 Permissions
This is the step most guides rush through — but getting IAM wrong causes the most errors when you offload WordPress media to Amazon S3. Follow these steps carefully.
- In the AWS Console, search for IAM and click it
- In the left sidebar, click Users → Create user
- Enter a username — e.g.
offloadx-wordpress - Click Next
- Under Permissions options, select Attach policies directly
- Search for and select AmazonS3FullAccess
- Click Next → Create user
Now create the access keys for this user:
- Click on the user you just created
- Go to the Security credentials tab
- Scroll to Access keys and click Create access key
- Select Application running outside AWS
- Click Next → Create access key
You’ll see your Access Key ID and Secret Access Key. Copy both now — the secret key is only shown once.
Security tip: Use AmazonS3FullAccess for simplicity, or create a custom policy restricting access to only your specific bucket for better security. The custom policy approach is covered in the AWS S3 policy documentation.
Step 4 — Configure Bucket Permissions and CORS
Before you offload WordPress media to Amazon S3, you need to add a bucket policy and CORS configuration so files load correctly on your site.
Add a Bucket Policy
- In S3, click your bucket → Permissions tab
- Scroll to Bucket policy and click Edit
- Paste this policy (replace
YOUR-BUCKET-NAMEwith your actual bucket name):
{
  "Version": "2012-10-17",
  "Statement": [
    {
      "Sid": "PublicReadGetObject",
      "Effect": "Allow",
      "Principal": "*",
      "Action": "s3:GetObject",
      "Resource": "arn:aws:s3:::YOUR-BUCKET-NAME/*"
    }
  ]
}
Click Save changes.
Add CORS Configuration
- Still on the Permissions tab, scroll to Cross-origin resource sharing (CORS)
- Click Edit and paste this:
[
  {
    "AllowedHeaders": ["*"],
    "AllowedMethods": ["GET", "HEAD"],
    "AllowedOrigins": ["*"],
    "ExposeHeaders": []
  }
]
Click Save changes. Your bucket is now ready to serve files publicly.
Step 5 — Install OffloadX on WordPress
OffloadX is the plugin that connects your WordPress media library to Amazon S3 and handles everything automatically — the easiest way to offload WordPress media to Amazon S3 without touching any code.
- In your WordPress admin, go to Plugins → Add New Plugin
- Search for OffloadX
- Click Install Now then Activate
Or download it from offloadx.com and upload via Plugins → Add New → Upload Plugin.
Step 6 — Connect OffloadX to Amazon S3
- In your WordPress admin, click OffloadX in the sidebar
- On the Storage Provider screen, select Amazon S3
- Enter your credentials:
- Access Key ID — from the IAM user you created
- Secret Access Key — from the IAM user you created
- Region — select the region where your bucket was created
- Click Verify Credentials
- From the bucket dropdown, select your bucket
- Click Save Settings
If you see a green checkmark, OffloadX is successfully connected to Amazon S3 and ready to offload WordPress media.
Troubleshooting: If verification fails, double check your region matches the bucket’s actual region. A mismatch is the most common cause of connection errors when you offload WordPress media to Amazon S3.
Step 7 — Configure Offload Settings
Auto-Offload New Uploads
Enable this. Every new file uploaded to your media library will automatically be sent to S3. This is the core behaviour you want when you offload WordPress media to Amazon S3.
Remove Local Copy After Upload
When enabled, OffloadX deletes the file from your server after uploading to S3, freeing disk space immediately. Recommended if your goal is to reduce server storage.
Rewrite URLs
Always enable this. It updates all media URLs in your posts, pages, and widgets to point to S3 instead of your server. Without this, images still load from your server even after the offload.
Force HTTPS
Enable this if your site uses HTTPS — it ensures all S3 URLs use https:// to avoid mixed content warnings.
Step 8 — Bulk Migrate Your Existing Media Library
New uploads are handled automatically, but your existing media library still needs to be moved. This is the final step to fully offload WordPress media to Amazon S3 — including everything already on your server. OffloadX’s Bulk Migrator handles this in one click.
- In OffloadX, go to the Bulk Migration tab
- Click Start Migration
- OffloadX uploads all existing files to S3, rewrites URLs in your database, and optionally deletes local copies
For large libraries the migration runs in batches. You can leave it running — it picks up where it left off if interrupted. Take a full backup before running bulk migration.
Step 9 — Set Up CloudFront CDN (Optional but Recommended)
By default, S3 serves files from a single AWS region. Visitors far from that region experience slower load times. Amazon CloudFront is AWS’s CDN that distributes your files globally — similar to what Cloudflare does for R2.
To set up CloudFront with your S3 bucket:
- In the AWS Console, search for CloudFront and click it
- Click Create distribution
- Under Origin domain, select your S3 bucket
- Under Viewer protocol policy, select Redirect HTTP to HTTPS
- Click Create distribution
- Wait for the distribution to deploy (5–15 minutes)
- Copy the Distribution domain name (looks like
d1234abcd.cloudfront.net) - In OffloadX, under Settings → Custom CDN URL, enter the CloudFront domain
Your media will now be served from CloudFront’s global edge network instead of a single S3 region.
Troubleshooting Common Issues
403 Forbidden on media files
Your bucket policy is missing or incorrect. Re-check Step 4 — the bucket policy must allow s3:GetObject for Principal: "*". Also verify Block Public Access is disabled.
InvalidAccessKeyId error
The Access Key ID is incorrect. Go back to IAM, find your user, and verify the key. If you can’t find it, create a new access key — old ones can’t be recovered.
SignatureDoesNotMatch error
The Secret Access Key was copied incorrectly — usually a trailing space. Delete the key pair in IAM, create a fresh one, and re-enter in OffloadX.
Images not showing after migration
Make sure Rewrite URLs is enabled in OffloadX. Also flush your site cache — caching plugins often serve old URLs after a migration.
NoSuchBucket error
The region in OffloadX doesn’t match the bucket’s actual region. Check the bucket’s region in S3 and update the region setting in OffloadX to match exactly.
CORS errors in browser console
Your CORS configuration is missing or incorrect. When you offload WordPress media to Amazon S3, CORS must be configured correctly or browsers will block cross-origin media requests. Re-check Step 4 — the CORS policy must include AllowedMethods: ["GET", "HEAD"] and AllowedOrigins: ["*"].
Should You Use Amazon S3 or Cloudflare R2?
Before you offload WordPress media to Amazon S3, it’s worth knowing that Cloudflare R2 is often the better choice for WordPress sites — especially if cost is a concern.
| Amazon S3 | Cloudflare R2 | |
|---|---|---|
| Storage cost | $0.023/GB | $0.015/GB |
| Egress fees | $0.09/GB | Free |
| Free tier | 5 GB (12 months) | 10 GB (permanent) |
| CDN included | No (needs CloudFront) | Yes |
| Setup complexity | Higher (IAM, CORS, policy) | Lower |
| AWS integrations | Yes | No |
Choose S3 if: You’re already in the AWS ecosystem, need advanced features like Glacier or Object Lock, or your team manages other AWS services.
Choose R2 if: You want the lowest cost, simplest setup, and built-in CDN without extra configuration.
What It Costs to Offload WordPress Media to Amazon S3
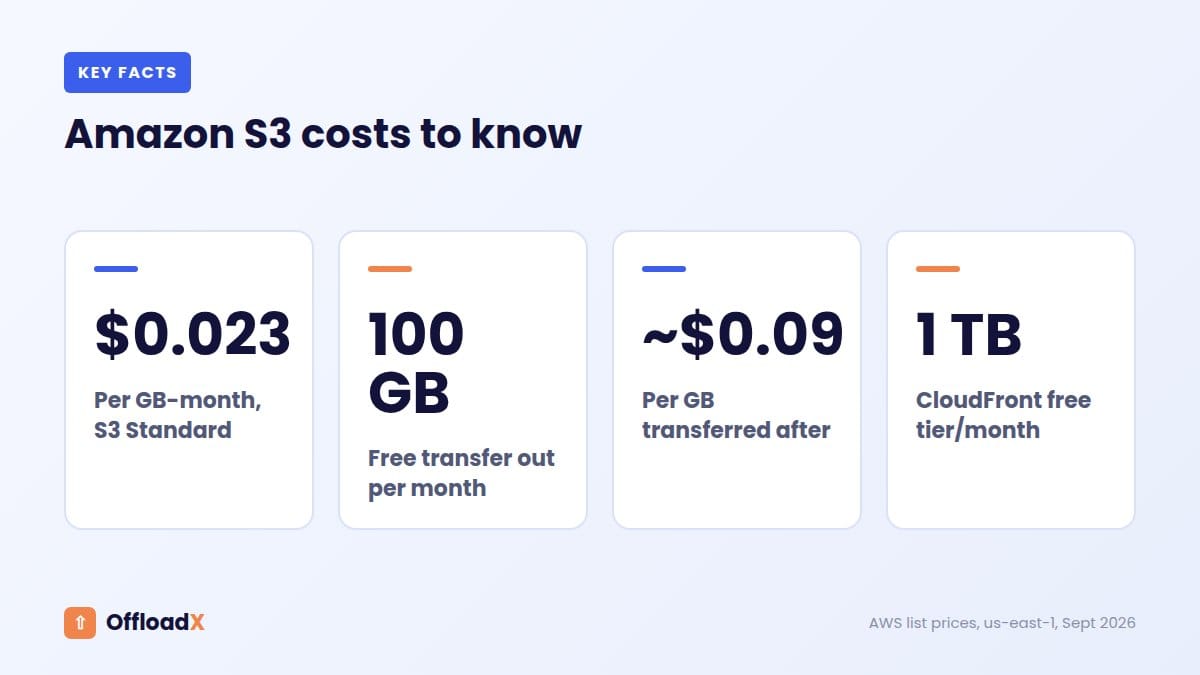
Amazon S3 bills separately for storage, requests and data transfer, so it helps to estimate all three before you offload WordPress media to Amazon S3. At list prices in us-east-1, S3 Standard storage is about $0.023 per GB-month. According to the Amazon S3 pricing page, the first 100 GB of data transferred out to the internet each month is free across AWS, and after that transfer is billed per GB, roughly $0.09 per GB for the first 10 TB.
| Site | Storage | Transfer out | Approx. monthly S3 bill |
|---|---|---|---|
| 50 GB stored, 300 GB served | $1.15 | $18.00 | about $19 |
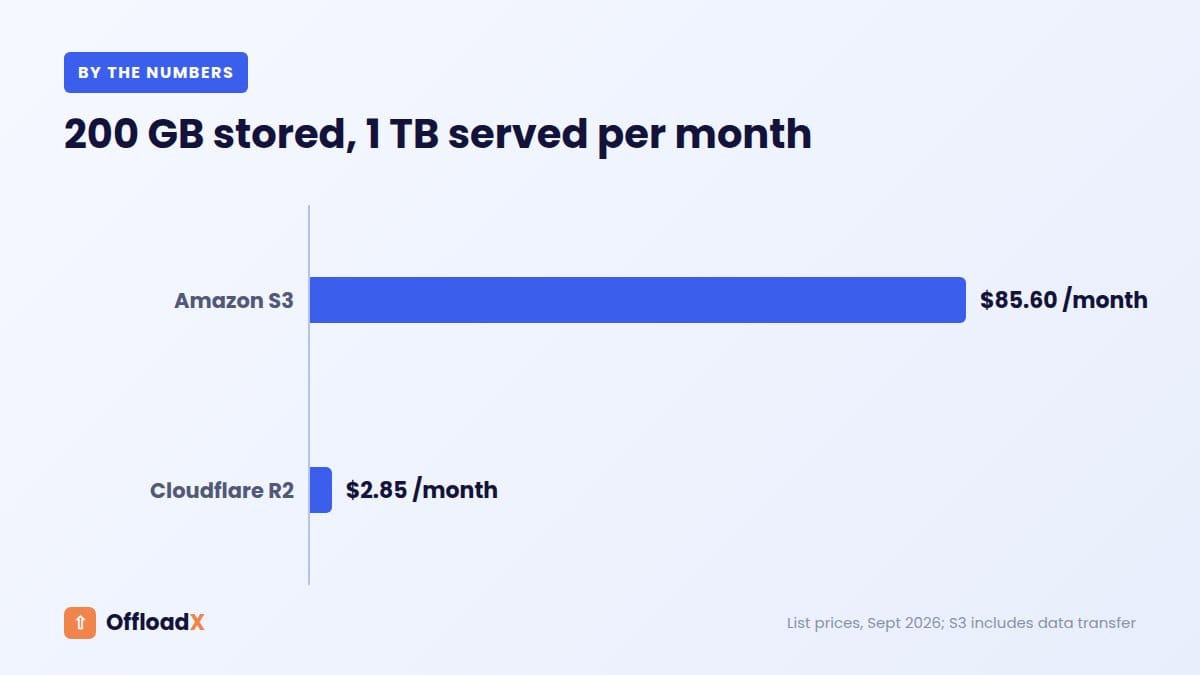
| 200 GB stored, 1 TB served | $4.60 | $81.00 | about $86 |
| 500 GB stored, 3 TB served | $11.50 | $261.00 | about $272 |
Transfer is the line that grows with traffic. If your site is busy, compare S3 with Cloudflare R2, which has no egress fees, in our Cloudflare R2 vs Amazon S3 guide.
How CloudFront changes the maths
Putting Amazon CloudFront in front of your bucket usually lowers the bill and speeds up delivery. CloudFront’s always-free tier includes 1 TB of data transfer out per month, and it caches your images at edge locations near visitors. Enter the CloudFront domain as the optional CDN domain in OffloadX so image URLs use it.
Keep Your S3 Setup Safe
When you offload WordPress media to Amazon S3, a few security habits prevent the most common mistakes.
- Use a dedicated IAM user whose policy only allows access to your media bucket. Never use your AWS root account keys.
- Allow only what the plugin needs: reading, writing and deleting objects in that one bucket.
- Make only media public. Keep backups, logs and private files in separate private buckets.
- Turn on multi-factor authentication for your AWS account.
- Set a billing alarm in AWS so unexpected traffic never goes unnoticed.
Common S3 mistakes and fixes
| Mistake | What happens | Fix |
|---|---|---|
| Wrong region selected | Connection test fails | Use the exact region the bucket was created in |
| Block Public Access left on | Images return Access Denied | Allow public reads for the media bucket, or serve through CloudFront |
| Root keys used | High risk if leaked | Create a scoped IAM user and new keys |
| No CDN in front | Slow for distant visitors, higher transfer bill | Add CloudFront and use its domain in OffloadX |
Not sure S3 is the right provider? Our best cloud storage for WordPress comparison covers R2, Wasabi, Backblaze B2, Bunny and DigitalOcean Spaces as well.
Before going live, run a quick test upload and open the image in a new tab to confirm it loads from S3 or your CloudFront domain.
Frequently Asked Questions
Is it free to offload WordPress media to Amazon S3?
Amazon S3 has a free tier — 5 GB storage and 15 GB data transfer per month for the first 12 months. After that, you pay $0.023/GB for storage and $0.09/GB for egress. For busy sites, these costs add up — see our cloud storage cost comparison for full pricing details.
Will my existing images break when I offload WordPress media to Amazon S3?
No. OffloadX rewrites all media URLs in your database as part of the migration. Images continue loading on your site — just from S3 instead of your server. Visitors won’t notice any difference.
Do I need CloudFront to offload WordPress media to Amazon S3?
No, but it’s recommended. Without CloudFront, files are served from a single AWS region which means slower load times for visitors in other parts of the world. CloudFront distributes files globally and improves load speed significantly.
Can I revert from S3 back to my server?
Yes. OffloadX includes a Revert feature that copies files back to your server and rewrites URLs to local paths. If you kept local copies enabled during migration, the revert is instant.
What’s the difference between S3 and S3-compatible storage?
S3-compatible storage (like Cloudflare R2, Wasabi, and DigitalOcean Spaces) uses the same API as Amazon S3, so the same tools and plugins work with all of them. The difference is in pricing, performance, and extra features. OffloadX supports all major S3-compatible providers.
How much does it cost to offload WordPress media to Amazon S3?
It depends on your storage size and traffic. A small blog with 10 GB media and 50 GB/month bandwidth pays roughly $4–5/month. A large WooCommerce store with 200 GB media and 2 TB/month bandwidth could pay nearly $200/month — mostly in egress fees. Compare providers in our full cost comparison guide.
Conclusion
Now you know exactly how to offload WordPress media to Amazon S3 — from creating your bucket and IAM user to configuring permissions, connecting OffloadX, and running a bulk migration. When you offload WordPress media to Amazon S3, your server stops storing media entirely and S3 handles delivery at scale.
OffloadX connects to Amazon S3 in minutes and handles everything automatically from there — new uploads, URL rewriting, and bulk migration included.
Download OffloadX Free →Have questions about this setup? Leave a comment below or reach out via our support page.